POWERFUL
SOFTWARE

The surface metrology software SCAN SUITE combines SCAN CT
for individual measurements and data analysis
with the automation module ASCAN.

SCAN CTASCAN

SCAN CT

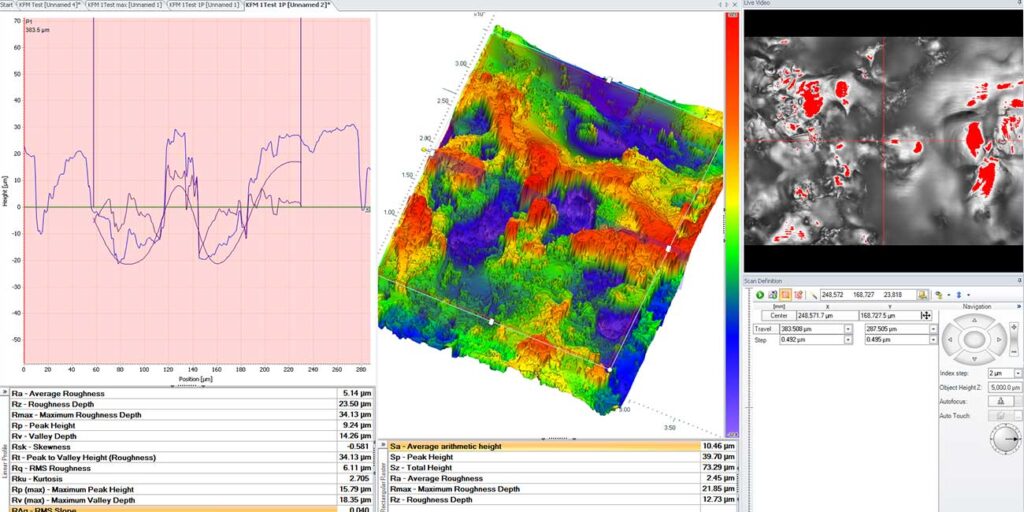
SCAN CT is a software package for measuring and analyzing 2D profiles and 3D raster maps. It offers complete 2D and 3D surface measurement parameters as well as sophisticated filter and compensation methods.

  • Complete 2D and 3D surface analysis
  • Profile and 3D Roughness measurements according to DIN ISO EN standards
  • Comprehensive profile and surface compensations
  • Advanced filter technologies
  • Uni- / bi-directional scanning
  • Linear, circular and elipsodal scanning
  • Simultaneous data collection of up to 5 sensors
  • Dedicated user management
  • Up to 200 Mio data points per raster
  • Fast multi-thread technology

Features & highligths of Scan CT

2D profile measurement
  • Step Height (avg., max. and min. height)
  • Flatness and Warpage
  • Width and Length
  • Cross Section Area
  • Angle, Radius, Contour Analysis
scanct_01

Height and Width Measurement of a solar cell finger.

Define base line and measurement areas using reference and measurement cursors. Select analysis from dropdown menu.

Profile analysis on a metal precision part

Profile analysis on a metal precision part.

3D COPLANARITY MEASUREMENT
  • 3D Height (avg., max. and min. height)
  • Flatness and Warpage
  • Coplanarity
Coplanarity Measurement of a BGA Component

Coplanarity measurement of a BGA component

Draw rectangle, round or polygon cursors to define base plane and measurement areas.

3D surface of the BGA component

3D surface of the BGA component

3D ROUGHNESS MEASUREMENTS
  • New DIN EN ISO 25178 Parameters
  • 3D Waviness Filters
  • 3D Abbott-Firestone material curve, Histogram
Roughness Measurement on a solar wafer

Roughness Measurement on a solar wafer

Use advanced DIN /TS 16610 Filters. 3D Roughness Analysis even on warped or uneven surfaces.

3D Surface

3D Surface

PARALLEL DATA COLLECTION
  • Parallel scanning with up to 4 sensors
  • Collect Top, Bottom and Thickness data
  • Average Thickness, Bow and Curvature
  • Total Thickness Variation
  • Parallel Intensity Masking
Top, bottom and thickness profile of a solar wafer

Top, bottom and thickness profile of a solar wafer

Graphical display of thickness maps and top/bottom surfaces.

Top and bottom surface of a fuel cell component

Top and bottom surface of a fuel cell component

Profile roughness measurements
  • DIN EN ISO conform Roughness Parameters
  • Shape Removal Algorithm
  • Abbott-Firestone Material Curve
  • Histogram
  • Tip Simulation for Non-Contact Systems


scanct_03

Roughness Measurement on a metal surface.


Advanced roughness analysis, even on round or angled surfaces using shape compensation. Display waviness and roughness profile.

2D Abbott-Firestone material curve, Histogram

2D Abbott-Firestone material curve, Histogram

3D VOLUME & AREA MEASUREMENTS
  • Volume (Cuts, Fills, Net Volume)
  • Planar area
  • Surface area
Volume calculation on a thin film print

Volume calculation on a thin film print

Measures cuts and fills and uses height threshold. Accurate areal and planar surface calculations.

3D Surface

3D Surface

2D / 3D SURFACE COMPENSATION
  • 2D and 3D Polynom Fit
  • Pre- and after measurements
  • Areal Waviness Compensation
Copper surface defect with areal waviness filter

Copper surface defect with areal waviness filter

Surface compensation is only applied based on the data in the reference cursors.

Platinum print pre and post 3D-polynom fit

Platinum print pre and post 3D-polynom fit

MORE FEATURES AND HIGHLIGHTS
  • x-, y-, z-data stitching capability
  • 2D and 3D etch detection algorithm
  • 3D surface matching
  • Raster up to 400,000,000 data points
  • Integrated user management
Automatic detection of BGA bumps

Automatic detection of BGA bumps

Compare geometry by overlaying profiles.

Profiles across a fuel cell component

Profiles across a fuel cell component

ASCAN

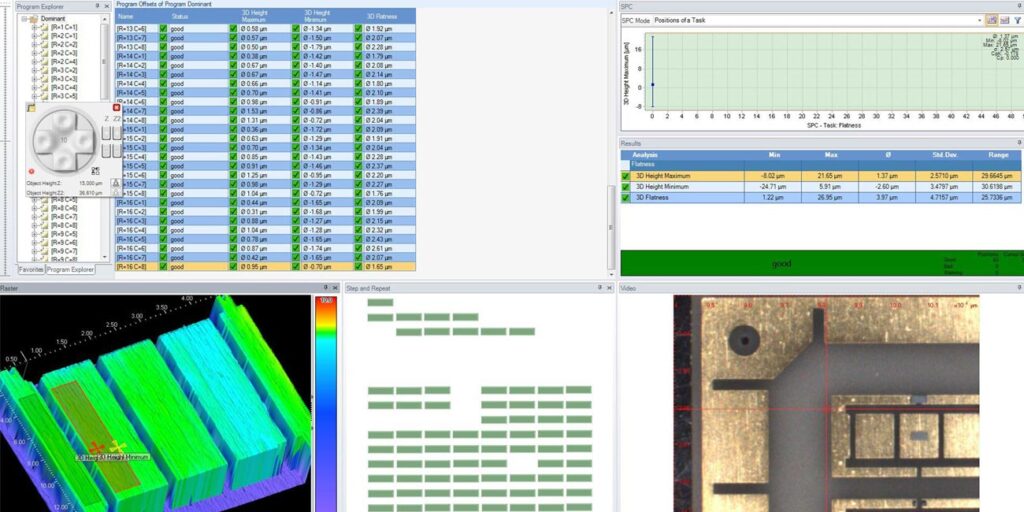
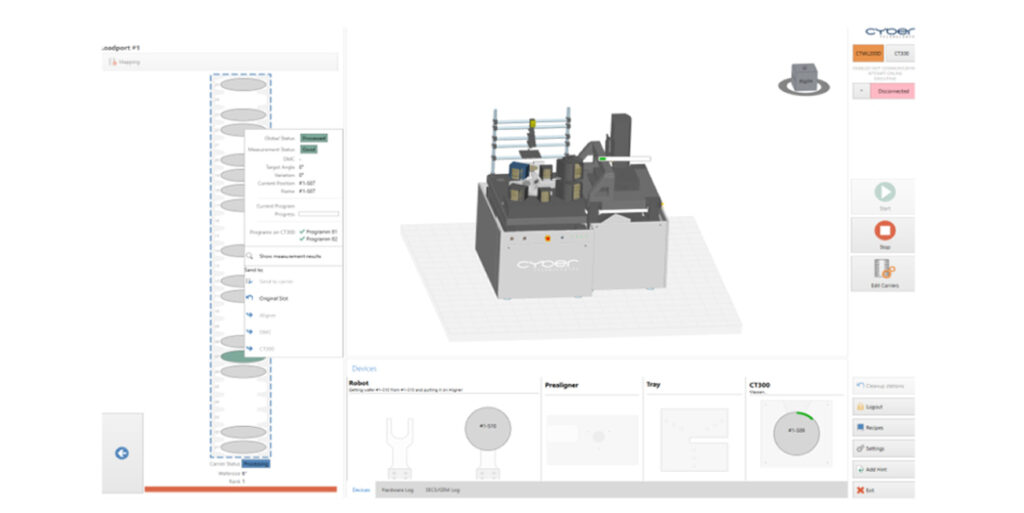
ASCAN is a software package for creating automated 2D profile and 3D raster measurement routines. This allows the cyberTECHNOLOGIES VANTAGE and CT SERIES to be used in production. Measurement data are collected fast and without user interference for maximum repeatability.

  • Easy to use menu based software tool
  • No programming skills required
  • All analyses, compensations, and filters from SCAN CT
  • Automatic position correction using pattern recognition (fiducials and edge alignment)
  • Step and Repeat (with multilayer function)
  • Definition of tolerances (UCL, LCL, UWL, LWL)
  • Colored warning indications (good, bad, warning)
  • Built-in SPC charts with report function (x bar / rank, position-specific)
  • Flexible data saving option (automatic, manual, with user interaction)
  • Stylesheets for user defined data output format
  • Integrated database for templates and SPC data
  • Web service for direct data transfer to CAQ system
  • 2D and 3D edge detection algorithm
  • 2D and 3D correlation algorithms
  • Easy programming using tasks and templates (no script language)
  • Virtual Tasks for user defined analysis and calculations
  • Table view for multiple results
  • User fields (accepts barcode, DMC, predefined list etc.)
  • Traceability
  • Plug-Ins for customized software solutions
  • SECS/GEM

ASCAN features & highligths

AUTOMATED MEASUREMENT
  • Easy to use menu based software tool
  • No programming skills required
  • Automated data analysis without user interference
  • Ideal for use in production or laboratory
ASCAN automated measurement

ASCAN user interface with results and data review

Multiple results per position, switch between box view and table view.

ascan_2DProfilmessungen2

Measurement of height max and diameter of bumps


FIDUCIAL CORRECTION
  • Part offset and rotation compensation
  • Manual and automatic mode
  • Scan definitions follow part rotation

ascan_LagekorrekturmitReferenzmarken1

Live video and calibrated crosshair on a hybrid circuit

STEP AND REPEAT
  • Easy program setup using step and repeat
  • Designer for multiple levels
  • Activate / deactivate individual offsets

Step and repeat preview of a semiconductor package

Step and repeat preview of a semiconductor package

VIRTUAL TASK
  • Use virtual task to link existing results
  • Create custom design analysis
  • Easy to use mathematical editor function

Calculation of die tilt in a virtual task

Calculation of die tilt in a virtual task

USER FIELDS
  • User field entries before or after program start or at defined conditions
  • Accepts bar code or data matrix entries
  • Automatic program search
  • Filter SPC data based on user fields
  • Data traceability
  • Enter numeric values for calculations in virtual tasks

Quick start menu with user field entries

Quick start menu with user field entries

INTEGRATED SPC AND DATA LOGGING
  • Define warning and failure limits
  • Clear Good / Bad / Warning indication
  • View X-bar / R SPC graphs
  • Print report function with charts
  • Advanced statistics
ascan_IntegrierteSPCundDatenerfassung1

X-bar / R Chart with cp and cpk values

Flexible data output via file or web-service for easy integration into existing CAQ software.

ascan_IntegrierteSPCundDatenerfassung2

Sample file in csv format for use in MS Excel

2D PROFILE TASK
  • Define analysis and scan setting
  • Save task to database and update from database
  • 2D edge detection with or without template

ascan_2DProfilTask1

2D task template with search areas for 2D edge detection

3D RASTER TASK
  • Multiple cursor sets per scan
  • 3D edge detection and correlation algorithm
  • Template fiducial for easy position teach-in

3D task template with multiple cursor sets

3D task template with multiple cursor sets

SPECIAL SETTINGS
  • Output surface maps and contours automatically
  • Integrated user management
  • Enter comments in SPC data

3D images of 9 positions on a solar cell

3D images of 9 positions on a solar cell

Questions?

We can help you finding the right measurement system for your application and budget needs.